About
The entry details page is your go-to hub for managing media assets. From customizing thumbnails to controlling access and scheduling, managing transcoding flavors, handling distribution and Live Streams, uploading captions and related files, editing video clips, adding advertisements, to managing user roles and permissions, it's all conveniently accessible in one place.
Entry details page overview

- back arrow (1) - to return to the Entries page
- entry details (2) - the details that display vary according to the type of media you select:
- Entry Id
- Creation Date
- Last Update
- Owner
- Duration
- Moderation Status
- Plays
- 'View Analytics' button (3) - Click to access the entry analytics dashboard. To learn more, visit our article Entry Level Analytics.
- three dots menu (4) - Click to access Download, Share & Embed, Launch Editor and Delete functions.
- 'Save' button (5) - Click to save any changes (the button is disabled until data is modified).
- navigation arrows (6) - Use to navigate to the next or previous entry.
- navigation arrow (7) - Use to navigate the entry details.
- 'Jump to' drop-down menu (8) - Choose a section of the page to jump to.
- entry thumbnail (9) - default thumbnail of media (videos will also have a play button for previewing)
- 'Share & Embed' function (10) - Click to access the Share & Embed page. For more information, visit our article Share and Embed Media.
- editor (11) - Click to launch Kaltura's Video Editor. For more information, check out our article Kaltura Video Editing Tools - Editor tab.
- editing tabs (12) - tabs that display according to the type of media you selected
- tab fields (13) - information that displays according to the tab you're on
Metadata
Entry Metadata fields are used to tag, manage, search and expose content. You can populate out-of-the-box fields (1) or create your own custom metadata schema. Kaltura provides extensive asset management and metadata capabilities. Each media entry has a list of predefined metadata fields including: Name, Description, Tags, Categories, Thumbnails, Duration, Views, and other fields. See Custom Data for more information.
Everything below the out-of-the-box fields (1) relates to custom metadata schemas and whether you have configured them as searchable. See Create a Custom Metadata Schema for more information.

Thumbnails
Use to upload thumbnails, grab a thumbnail from video, crop thumbnails and select a default thumbnail. You can generate thumbnails from videos or upload external images. 
Choosing a thumbnail for your video
By default, a thumbnail is generated from the video's first frames. You can choose a new thumbnail by selecting any frame from the video or uploading an image from your computer. You can assign multiple thumbnails of varying qualities to your video.
Upload
- Click Upload.
- Locate the desired image on your computer.
- Click Open.
The image is added to the list of thumbnails.

Choose Frame
- Click Choose Frame.
The Choose Frame From Video window opens. - Click the play button to play the video.
- Pause the video on the appropriate frame and press Capture and Save to save your thumbnail.
A thumbnail will be captured from the highest quality video flavor.

Click Set as Default on the thumbnail you want to use for the entry. The default thumbnail displays in the entries list.
Click on the three dots menu to the right of a thumbnail to Download, Preview or Delete the thumbnail.

You can't delete the default thumbnail directly. First, set another thumbnail as default, then delete the previous one.

If you have a distribution profile that requires a specific thumbnail dimension (you may have one or multiple distribution profiles) they will display as empty. You are required to provide a suitable thumbnail with the requested dimension to use for the distribution profile.
Access Control
Use this tab to assign an access control profile to the entry. Visit our article Access Control to learn how to create an access control profile.
Scheduling
Content Scheduling controls when your media entries are viewable (‘sunrise’) and when access ends (‘sunset’). You can tailor specific scheduling for your content, allowing it to be available at any time or within a set timeframe. Keep in mind, if users try to access expired content, they'll receive an error message. Kaltura validates start and end dates, so ensure they're accurate when setting a range.
To configure content scheduling
- Select Specific range.
- Set your specific time range.
- Click Save.

Flavors
Use to manage the flavors that are available as well as replace media files and their transcoding flavors.

Actions
You can apply actions to a selected flavor using the three dots menu at the end of the row.

The three dots menu offers the following:
The options in the three dots menu are based on that particular flavor type and its available actions.
- Download - Downloads the transcoded file to your desktop.
- Upload - Uploads a file from your desktop you that transcoded on your own, to serve as a flavor for an entry.
- Import - Imports a flavor to update existing assets or adds new ones. Click to open a window and enter the file URL.
- Drop Folder - Used for updating existing flavors or adding new ones. (You won't see this option in the menu if you don't have the required permission.) See our article Drop Folders Service for Content Ingestion to learn more.
- Preview - Previews the selected source flavor. The following information is displayed: Entry Name, Entry ID, Flavor Name, Flavor Asset ID, Bitrate, Codec, Dimensions, Format, Size (KB), and Status.
- Convert or reconvert - Convert to transcode an entry to additional flavors or reconvert to create the flavor again from the source.
- Delete - Deletes the flavor. When you delete, a confirmation will display: Are you sure you want to delete this Asset: <asset id> ? Click Delete to confirm.
- View DRM details - When your KMC account supports direct ingestion of multiple bit-rate transcoding flavors, you can use the menu to add or replace a single transcoding flavor in an entry.
Add / Replace media
Use to add media to a new entry you created when the entry status shown on the Entries page is 'No Media' (for example, a draft entry), and to replace the media of an existing entry when the entry status is 'Ready' or 'Error'. 
To learn how to add or replace an entry, check out our article Replace an Entry via KMC. To learn how to work with a draft entry, visit our article Create a Draft Entry.
Distribution
The Distribution tab lists distribution channels associated with an entry and use to manage distributors. To learn more about Kaltura's distribution service, visit our article Distribution. 
Live Stream
Use to create and manage Live Stream entries. See our article Create a Live Stream Entry to learn more.

Captions
Use to upload, order, and manage captions. Check out our article Subtitles and Captions to learn more.

Related Files
Use to upload related files to an entry. See our article Related Files for more information.
Clips
You can clip and trim entries using the Kaltura Video Editing Tools.
You can only trim and clip a live entry if it has a recorded entry.

Click Click & Trim to open the editing tools. Visit our article Kaltura Video Editing Tools - Editor Tab to learn how to work with the video editor.

If clips were created from an original video or audio entry, the clipped entry details are displayed in the clips tab. You can click on the clip ID to navigate to the entry details page of that clip.

The entry details page of a clip displays the original clip's ID.

Users
The Users tab is displayed when your account is configured to support the end-user management feature. Use this tab to add editing and publishing rights for additional end-users to work with this entry across applications.

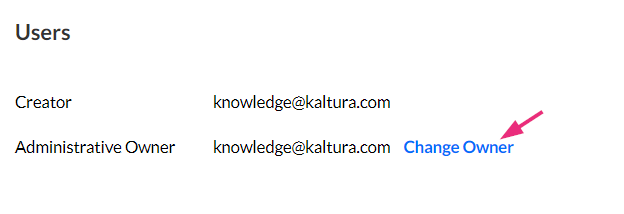
The Users tab provides information about the users that are associated with the entry:
- Creator: Usually the person who uploaded the media to Kaltura.
- Administrative Owner: The user in charge of managing the entry. By default, it's the creator, but you can change it here.
To change the Administrative Owner:
- Click Change Owner.
The Change Owner box displays. - Type in the desired user name or user ID.
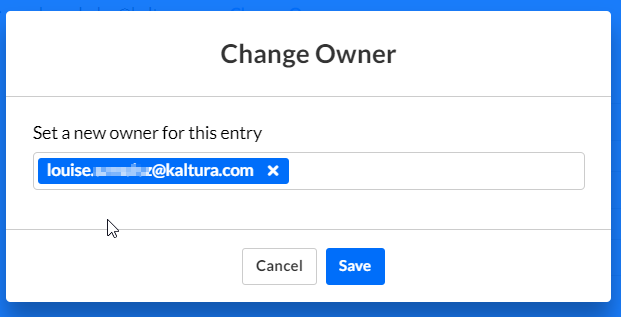
- Click Save.


By editing the co-editors, co-publishers, and co-viewers fields, you can add rights for additional end-users to work with this entry across applications.
Co-editors have permission to edit the metadata associated with the selected media, for example, customize the look and feel of an entry page.
Co-publishers have the permission to publish media anywhere that the user has the rights to publish.
Co-viewers have permissions to view the metadata associated with the selected media.
To learn more about roles and permissions, visit our article Administration Pages.
Advertisements
Use to create and manage time-based advertisements with the Kaltura Video Editing Tools. To learn how to add advertisements to media, see our article Kaltura Video Editing Tools - Advertisements Tab. For further information see Advertising and Ad Networks.


